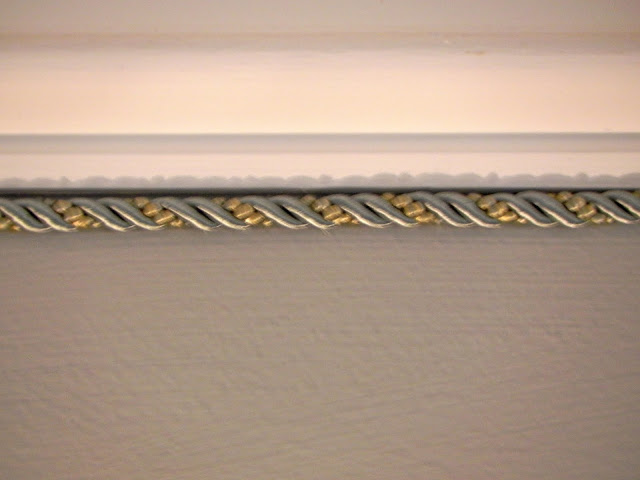
I'm hoping you can see past the poor photo quality to see my little design tip that I picked up from a magazine about 15 years ago.
Do you see the cording just above the chair rail?
The walls are grayish blue, and the detail trim is the same gray with a little gold. Here is a closeup:
A
And another:
H
Here is a photo with a flash:
I love the way adding this trim makes the moldings pop. And it's super easy and quite affordable. Here's what you do:
1. Buy some trim
2. Attach it to the walls
Haha...here are some slightly more useful tips:
The trim here is 1/4". I have used 1/2" before and like that, too. I think 1/8" would be too small, and anything over 1/2" too large.
I have used solid colors, and actually prefer them - one or two shades darker than the paint is perfect.
Here is what you want -- twisted cord with NO LIP:
Here is what you do NOT want -- cord WITH lip:
If you buy it with a lip, as I have done before, you have to rip the lip off. Time consuming, messy, and leaves a TON of clear thread pieces that you have to pull out. Seriously, get it without the lip.
To hang it, I always run a very thin bead of glue around the wall where I want it. I like the symmetry of it "framing" the paint. So for example, I like it at the ceiling molding and baseboards, or ceiling molding and chair rail.
After running the glue, start in one corner and nail the end of the trim into the wall in the corner. Try to have ONE LONG continuous cut of cording so there are no seams. If you do have to have a seam, put clear tape around the end of the cord and cut through the tape so it doesn't fray. After nailing in the corner, run it along the glue line, taping it up where necessary until the glue dries. Easy-peasy.
I usually only use a few nails -- in the corners primarily, and let the glue do the rest of the work.
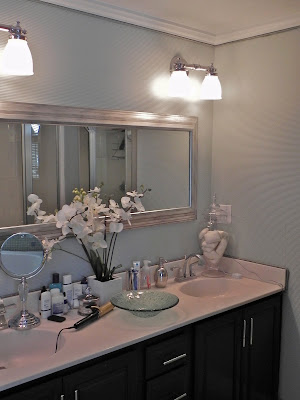
Here is another room I've done. I'm trusting you not to judge my bathroom based on the mess on the counter! I wanted to get this post up and clearly didn't have time to clean. This trim is 1/2" wide:
If you can't find the trim you want in your local fabric store (JoAnn is good if you have one), there are also on-line sources. I like JKM Ribbon.
Linking to THESE FABULOUS PARTIES.
That's it for today.... Thank you all for reading. I hope you'll consider sharing and/or subscribing!
Thanks for reading!!
I hope you'll visit my store for Rugs, Lighting, Art, Furniture and more:

,Must See Daily Deals at One Kings Lane!

Advertisement: Best long sleeve leather coats look their best when they are well used along with womens coats. Beside gifts for her are quite stylish and stiff. A winter coats for women too is quite on the stiff side when just purchased. Find here super Pass4sure ccie exam product at better price.


Lovely!
Hi Stacy! That corded trim looks great on the walls. I remember a few years back Edward on Trading Spaces did this along the ceiling where the homeowners had no crown molding. Made it look so crisp!
Great finishing detail, Stacy. I'd never have thought to do that! Thanks for sharing!
~ Wendi ~
Great idea. I have actually done this. Its a great way to finish a room.
Looks awesome! I have never seen that before. Gorgeous room. : )
What a good idea! Making a mental note for future reference!
Very clever and so simple! thank you for sharing.
www.projectqueen.org
Wow!!! Love this idea, Stacy! It's that "classic w/ a twist" kind of thing, you know?
I also want to thank you so much for your comment yesterday. You're such a great friend and I honestly appreciate your support. Your comment really made me feel happy.
xo
Luciane at HomeBunch.com
Aren't you clever! And, I love your apothecary jars - they look great and are a favorite of mine. Also, thanks for your kind comments yesterday about the interview - I'll meet you in Sardinia!
Looks great! It adds that little touch! Great idea.
What a nice idea! so cute and easy to do! Thanks so much for the tip!
This is such a great idea, Stacy. I love it! Thanks for linking up to Shabby Shares @ Rustic Crafts!
What a great finishing idea. I like that! :)
~Liz
Great idea and could be used with out the crown molding. I'm a new follower from White Wednesday.
Laura
This is great information! Make such a difference in your room. I would love for you to share this at Show & Share--
http://southernlovely.blogspot.com/2011/09/show-share-4.html
Cute idea :)
I just love this clever and gorgeous idea. How simple and what a great impact it makes! Beautiful!! Fondly, Susie
WOW! That is such a pretty touch. I have never seen that done before. Thanks for sharing with my newbie party.
What a great idea, looks really pretty. I love your bathroom walls, are they wallpapered?
Thanks for sharing this great idea at Beach Cottage Good Life Wednesdays.
I never would have thought of that. What a fun detail!
Thanks for linking up! I'll be featuring this on my blog tomorrow!
http://sumossweetstuff.blogspot.com
Sumo:)
this is really pretty! I would love it if you would share this and/or any other projects you have been up to at Tuesday Talent Show at Chef In Training! Thanks so much and I hope to see you there!
-Nikki
http://chef-n-training.blogspot.com/
What a fabulous idea. It's beautiful!
Good Thought. Hats Off.
Trims
http://www.bbcrafts.com/specialty-ribbon/ric-rac-trim-/
Post a Comment